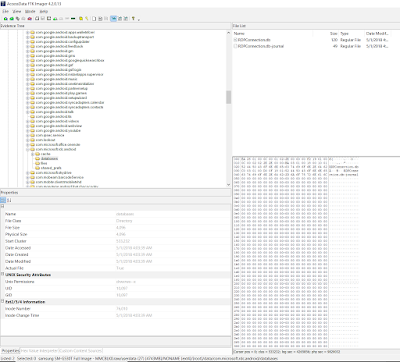
Microsoft Remote Desktop for Android (MRD) keeps pertinent information in the following files and locations:
- RDPConnection.db and RDPConnection.db-journal
- Both files located at: \userdata\data\com.microsoft.rdc.android\databases\
- SQLite database contains user account information, encrypted saved passwords, and target computer information like computer name and corresponding screenshot from the latest connection.
Long version:
This blog post is the second of a series dedicated to identifying forensic artifacts on mobile remote desktop applications. The first entries in the series are Android based but, thanks to my brother's generosity in gifting me some of his used iPhones, I plan do iOS based posts soon.
Remote Destop Protocol (RDP) provides a graphical interface from another computer over a network connection. It has been around since what it seems to be forever.
The Google Play page for MRD has over 5 million downloads for the Android version of RDP.
 |
| Google Play - MRD |
After installing MRD on the testing Android device I configure my Microsoft Surface laptop to accept RDP connections.
 |
| RDP enabled on target computer. |
To initiate the connection I placed both devices in the same network and started the app. The following screenshot shows some of the options that can be set to enable a connection.
 |
| Connection options |
 |
| Last screen before connection was terminated. |
- userdata\data\com.microsoft.rdc.android\databases\
 |
| RDPConnection.db |
- connection_table
- Contains the server name.
 |
| Server name. |
- credential_table
- Contains the user name and password.
- By looking at the java source code it seems the password is AES encrypted and base64 like encoding.
- screenshot_table
- The image blob is a PNG file. As seen below the DB Browser for SQLite is not able to properly show the blob content.
 |
| Screenshot table blob. |
Since the pertinent connection data is split in these three tables a SQL query is used to combine the tables based on the user.
First we need to find how tables are linked to each other. Thankfully the field names in all the tables are clear and descriptive enough to easily establish how they are related. One way of writing the query would be like this:
select * from credential_table, connection_table, screenshot_table
where credential_table.credential_table_id = connection_table.credential_id
and screenshot_table.screenshot_table_id = connection_table.connection_table_id
The easiest and most efficient way I found to make these queries is by using Sanderson Forensics Forensic Toolkit for SQLite. It has a graphical query builder and the ability to present stored blobs in their image form.
 |
| Sanderson Forensics Forensic Toolkit in action |
As can be seen in the previous image the tool creates the SQL query automatically as the user graphically links the tables together. The tool also does much more like enabling the analyst to look at the contents of journal entries and wal logs. This topic is beyond scope for this blog entry but if you wish to learn about SQLite databases in depth and how these forensic abilities can enrich your cases check out Paul Sanderson's book on the topic. I made a review here.
Lastly the MRDP app and user data can be exported and imported in a VM for examination. I detail the process here. If the user-name/password combination is saved in the credential_table the target computers can be accessed via the VM assuming a proper setup of the network/Internet connection. In my local LAN testing I was able to access the target computer from my VM using the extracted data from the app without having to type the user name of password. As always make sure proper consent and/or legal authorization is obtained before accessing third party systems.
As always I can be reached on twitter @alexisbrignoni and email 4n6[at]abrignoni[dot]com.
